IMPORTANT: At the time this manual was created, due to this being a new feature, none of the official
Spriter implementations support playback of Spriter files which use these texture-atlases. While we’ll do
our best to make sure our official reference implementations include support for this feature in the near
future, we can’t guarantee how soon, and have no control over if or when support will be ported to 3rd
party Spriter API’s. For this reason, before using this feature, be sure to make sure whichever authoring
system you will be using has support for Spriter and texture atlases.
While Spriter allows you the convenience of using
separate image files and effortlessly adding new ones
needed to your project as needed, an actual game
engine benefits from having the source images for
animations consolidated into texture atlases. A texture
atlas is a single large image which contains multiple
images, along with a text files (in this case .json
format) which tells your game engine the position,
size, and name of each individual image in the texture
atlas image.
Creating a Texture Atlas using Clone of Your Project (Pro Only)
Spriter Pro User’s Manual version 1.4


While some authoring systems like Unity and Construct 2 have automatic methods to handle the
individual images and consolidate them into texture atlases, other languages or authoring systems might
not have such built in functionality. Luckily, Spriter Pro has a built-in feature which will allow you to
take your Spriter project you’ve made with separate images, and create a clone of it which will use
optimized texture atlases.
Here’s how to do it.
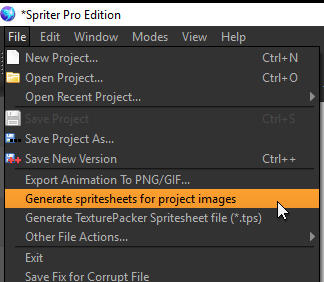
1) Once your Spriter project is finished, choose
File/Generate spritesheets for project images from
Spriter’s menu.
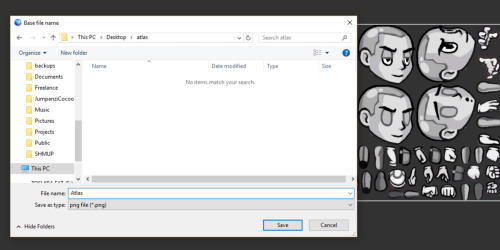
2) The ”pack images”dialogue and a small pop-up will appear. The pop up is telling you to select a target
folder for the texture atlases and clone project which will be created. Click OK and then a file selector
dialogue will appear. Pick your destination folder and type the name prefix you’d like the generated files
to have. Then click OK.
3) Now you have access to all the settings in the “pack images” dialogue. The first thing to do is decide if
you just want to create texture atlases or if you want texture atlases AND a clone of your Spriter project
which will use them instead of the separate images. If the later is the case, then make sure the “save
spritesheeted project” checkbox is checked.
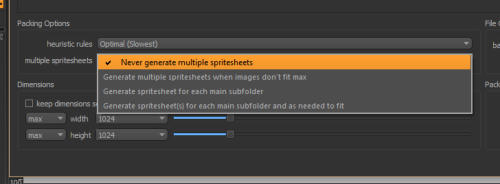
4) The next thing you’ll want to do is decide how Spriter will organize the images when creating the
atlases. In the “multiple spritesheets”, select from one of the following options… whichever best suits
your needs:
•
“Never generate multiple spritesheets.” ( if you use this option, be sure you set the texture atlas
maximum size large enough to fit all the images your project uses.)
•
“Generate multiple sritesheets when images don’t fit maximum.” ( This option lets Spriter create as
many texture atlases as needed to fit all the images.
•
“Generate spritesheets for each main folder.” (this option will make a texture atlas for each image
folder in the main folder. Any images sub folders of those folders will be included in the single
texture atlas for each main folder in the project.)
•
“Generate spritesheets for each main folder and as needed to fit.” (this option covers all your bases,
starting with an atlas per folder, but also making additional atlases per folder if required to fit all the
images for each folder into the initial atlas for that folder.)
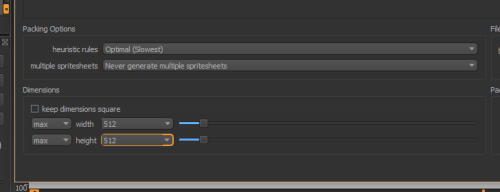
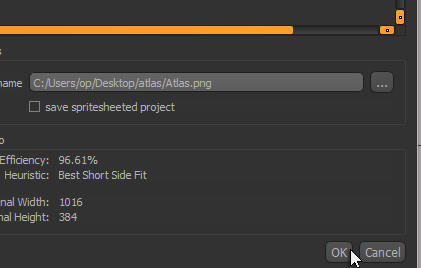
5) Set the maximum size for any texture atlas image. The default is 1024, but you can set this to suit your
needs, HOWEVER, make sure this maximum size, coupled with the setting you chose in step 4 allow for
all images to fit into the texture atlas(es). An easy way to tell is the OK button at the bottom-right of the
“pack images” dialogue. It will be greyed out and not clickable if your settings can not accommodate all
of your projects images.
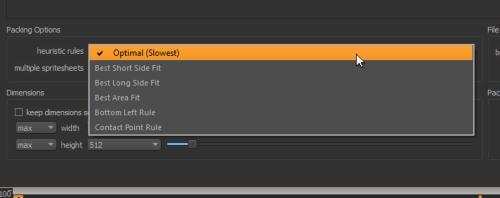
6) If you’re dealing with an especially large project it might be possible that Spriter might take some time
to find the most optimized texture atlases (though in our testing even large projects per packed in a matter
of seconds). If for some reason the default “heuristics” setting is taking too long, you can use the drop
down list in the “heuristic rules” setting to pick an option that might be slightly less optimized, but will
process faster.
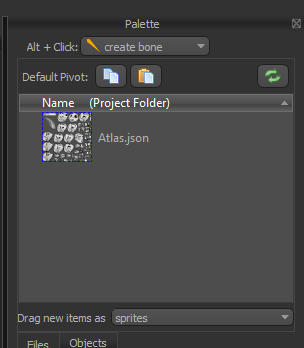
7) Once all settings are to your liking, just click the “OK” button near the bottom-right of the “pack
images”dialogue and your texture atlases (and Spriter file which uses them) will be created in the target
folder you had selected!