For anyone who will be using Spriter to create animations to be used in game engines that require
sequential image frames or sprite-sheets, one important requirement is often to have every frame
(possibly of all animations) cropped to a very specific pixel dimension.
Spriter offers a great way to visually set the cropping of any animation in a very visual way. The cropping
settings for each animation will be saved the next time you save your Spriter file, so if you ever need to
tweak then re-export your animations you won’t need to set the cropping a second time.
Here’s how:
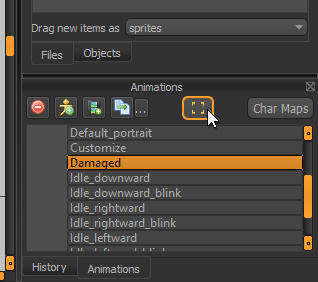
1) Select the animation you’d like to create or edit the custom trimming settings for, then click the small
orange cropping square icon (”Change Animation Export Box Size”) to bring up
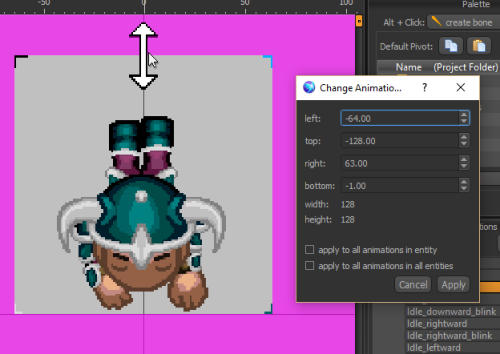
the special cropping dialogue. The canvas area should change in appearance, with the cropped out area
of the canvas being a magenta color and a grey rectangle representing the portion of the canvas which
would be visible in the resulting exported animation.
Creating Custom Trimming Settings For Each Animation
Spriter Pro User’s Manual version 1.4


2) If you hover your mouse pointer near any edge of the grey rectangle, you’ll see arrows appear which
sow that if you left click and drag you’ll be able to adjust the position of that edge to resize and reposition
the clipping rectangle. The “Change Animation Export Size Preset”dialogue box will update on the fly to
let you know the exact pixel dimensions of the resulting animation frames.
IMPORTANT: You can use the 1 and 2 keys to change which key-frame you’re viewing in the canvas or
lift click and slide along the timeline to look at any point in the animation to make sure you’re not going
to accidentally crop out part of your art-work.
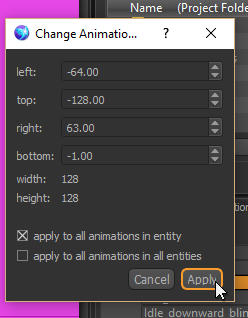
3) You can also type directly into any of the numerical settings
in the dialogue box to adjust the cropping numerically.
Once you’ve perfected your cropping settings you must decide
if this should be applied only to this animation, to all
animations in the Entity, or to all animations across all entities,
and to check our un-check the appropriate check-boxes at the
bottom of the dialogue box.
4) Once you are sure of your settings, click “Apply” at the lower right of the dialogue box and your
settings are ready to use. Don’t forget to save your Spriter file so you don’t lose your custom cropping
settings!
5) Once you’re ready to export your animation, be sure to change the “source rectangle” option in the
“Export Keyframes to PNG/GIF” dialogue to “set to animation preset” for your custom cropping settings
to be used.