Organizing your project folders and images before you begin.
Before you start up Spriter itself, its important to understand, Spriter is not used to draw images from
scratch, it's used to combine, move, rotate and stretch images you've already created in order to create
fully assembled frames and animations.
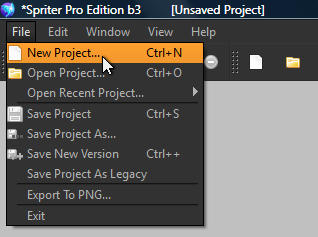
Step 2) (Starting Spriter and creating your project
file) Start Spriter and from the main menu
choose: File/New Project or hold Cntrl+N.
You will be prompted to choose the root folder for
your project. Click OK and then use the file
dialogue to direct Spriter to the main project folder
you had created.. In the case o four example, this
would be the folder called “Platformer”. Spriter's
working interface will then appear and you'll be
ready to begin creating your first key frame.
IMPORTANT! Once you begin your Spriter project, the actual Spriter file (.scml) should always be
saved in the main project folder which you'd created. You can save backup files of the .scml anywhere
you'd like, but if you then load them, they won't know where to find the required images because
Spriter only looks for images from the same root as the .scml file itself.
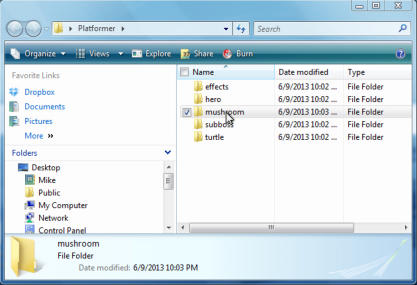
Step 1) (Getting your images ready)
Create a project folder which will be
used for your Spriter
project. Then add sub-folders in which
you should organize the PNG images
you'll be using to create
your animations. For example: If you
were creating animation sets for a
platformer game, you might
first create the project folder and name
it “Platformer” and then inside that
folder you would create
other folder named ”hero”,
“mushroom”, “turtle”, “effects”, “sub-
boss” etc and within each of those
folders you'd place the images you'll be
using to create and animate those
respective characters or objects.
Starting A Project
Spriter Pro User’s Manual version 1.4


