Spriter Pro offers the ability to add and several gameplay related types of data to your animations, with the
ability to change their values or settings at any time throughout the animation. These values, if numerical
can even tween smoothly from one keyframe to the next. If this sounds confusing so far, don’t worry,
We’ll go over the different data types and an example use one by one.
Adding Variables to an Animation (Pro Only)
Spriter Pro User’s Manual version 1.4


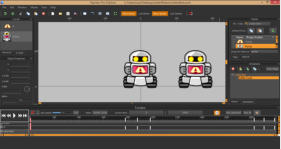
Example: Imagine you were making a game in which there were animated devices on screen that would
display specific letters or words, and cycle through, changing the word or letter they display over time,
on a loop. The player can click on the device while its displaying that specific letter or word in order to
input that specific letter or word to the game, perhaps to solve a puzzle or answer a question.
Of course you could just check the specific times along the timeline in Spriter where each letter or word
is displayed and hard-code those time intervals into your game engine to represent each character...but
not only is this tedious and unintuitive, it would mean if you changed the timing of your animation
you’d need to check and replace all your hard-coded time numbers in the game engine which represent
each letter or word. Luckily, With Spriter pro you can work in a much more intuitive and flexible
manner. Here’s how:
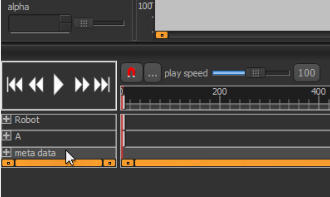
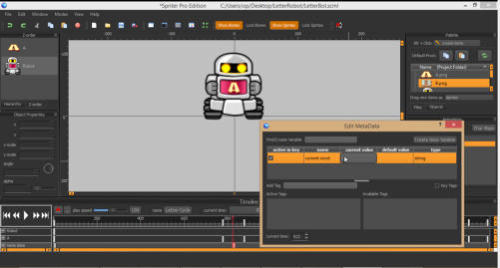
1) Expand your timeline panel upward to reveal the timelines for each specific object. If you scroll to the
very bottom of all timelines you’ll see a timeline titled “meta data” Double click in the meta data timeline
exactly where the first letter or word is visible and should now be clickable to the player. This will bring up
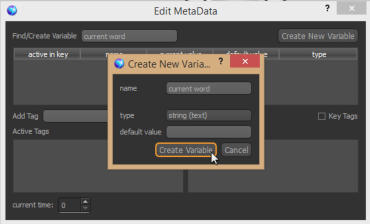
a dialogue which you will use to create and edit your “current word” variable. Type in the name you’d like
for your variable in the find/create variable box at the top-left of the dialogue, then click the “create
variable” box.
VARIABLES: Variables can be string (text), floats (numbers with decimal points), or integers (whole
numbers). You can give variables any name you’d like, and even give them a default value to start off
with. Variables are a way to have your Spriter animations tell your game engine all kinds of information
that can change aspects of gameplay, visual que’s for the user etc.
Text Variables: Sometimes text is more useful or easy to understand than numbers, and can either
communicate a string to your game engine, or directly to the player.
2) This will bring up a second dialogue box which will allow you to set the type (we want text), and the
default value. If the animation starts on a specific word or letter you can set that as the default if you’d like.
In this example we’ll assume the animated device is displaying the letter “A” by default. Once you’ve
entered your starting word or letter, (if there is no starting word or letter, just leave the default blank.) click
“create variable”.
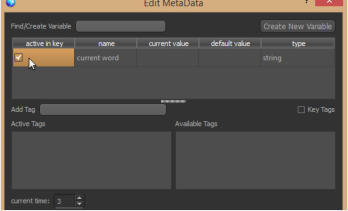
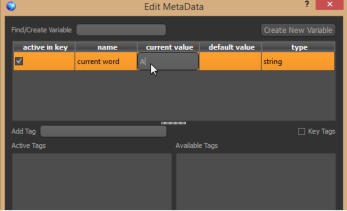
3) You’ll now see your variable in the variable list in the “Edit MetaData” dialogue box. Click on the
“active in key” checkbox and this will create a keyframe in the metadata timeline for this new variable. Now
you can doubleclick on the “current value” box and type in the word or letter that the device animation is
currently displaying. Once you’ve finished typing the letter or word, press enter and then close the dialogue
box via the red X close icon at the top right of the window. Don’t worry, your changes will be automatically
saved.
4) Now you should double click later on in the timeline, when the animation is either showing no letter or
word, or has changed to a new letter or word. This will bring the “Edit MetaData” dialogue back up. Now
reselct the variable you’ve already made by left clicking on it’s name, and then check the “active in key”
checkbox again. Now you can double click in the “current value” box again and enther the new text value
for the new letter or word that’s being displayed by the animation.
5) Once you’ve repeated step 4 for the entire animation so that all visible letters have a corresponding text
value set in the metadata for that portion of the timeline, then save your Spriter project.
In the game engine itself, once this Spriter file is being read and displayed, the logic of the game engine
would be something like:
Is the player clicking on the Spriter object displaying the device animation?
If yes, then set the text value of the letter or word to the current value of the “current word”
variable from the metadata.
Then you’d have the game react accordingly depending on whether or not the word or letter the player
clicked on was the appropriate answer.
INTEGER AND FLOAT VARIABLES work exactly the same, except they are useful when you need to
communicate changing numerical data to your game engine, depending on the current time of the currently
playing animation. One cool bonus to numerical variables is that they automatically tween between each of
their keyframes in the metadata timeline if the numerical value is different on each of the key frames. Don’t
forget, with things that tween, you can right click and hold on their specific key frames in the timeline and
choose the type of tweening you’d like to use, including no tweening at all. (instant)
PER OBJECT METADATA: In the previous example we created a variable in the metadata for the entire
animation. This is useful if the data you wish to create is relative to the timing of the entire animation, but
there’s a better option for when you want to create and communicate value which should related directly to
specific objects within the animation.
We’ll use collision rectangles as an example:
Assigning Numeric Data to a collision rectangle: As you might already know, you can place as many
distinct collision rectangles as you’d like at any given point along the time line of an animation. Their size,
shape, and angle can tween between their key frames. Each Collision rectangle can have a different name.
This alone offers some pretty awesome control of game play related data right within Spriter, but Spriter
takes it much further than that....
EXAMPLE: In this example we’ll be adding a variable to a collision rectangle to control the amount of
damage it would inflict when it collides with enemies within a game.
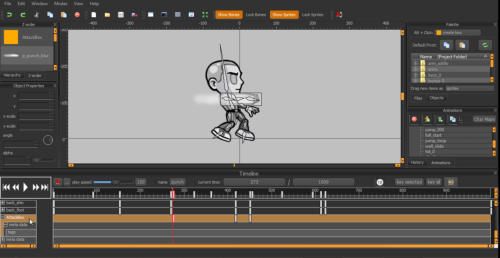
1) If you click on the little “+”icon to the right of the name of any objects timeline in the time line palette it
will expand to reveal the metadata timeline for that specific object. This works exactly like the metadata
we’ve created the text variable for earlier, but now this creates variables specifically for that particular
object!
2) In our example we have a punching animation for a fighting game, with a collision rectangle to designate
the part of the animation that should do damage to an enemy character to the game if the rectangle overlaps
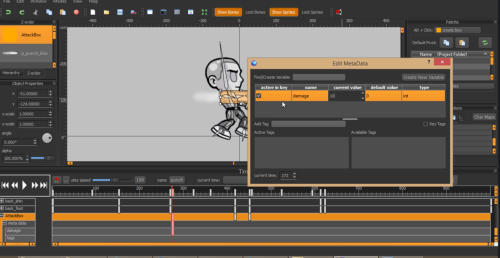
the enemy. We’ve named this rectangle “AttackBox”. Just as in the previous example for the text variable
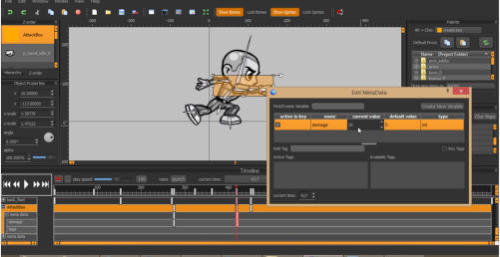
lets double click in the meta data timeline and add a variable, called “damage”, and decide if its type os
going to be float or integer. For most game types integer would be fine. Lets leave its default value blank,
and set its current value to 10. Don’t forget to make sure its set to “active in key”.
3) Now we’ll do the same thing, when the punch is at its apex (when it would do the most damage on
impact) and well double click at that spot further along in the timeline so we can set the “current value” to a
higher number. So lets check the “active in key” box, then double click the “current value” box and then set
it to 20.
In your game’s engine, the logic would be something like this:
Upon overlap of player Damage Collision box and an enemy.
AND the enemy is in a state where it can take damage.
THEN make the enemy play his taking damage animation.
AND temporarily set the enemy’s state so it can no longer take damage. AND subtract the
current value of the Variable :Damage” from the Collision Rectangle called “Damage” from the
hitpoints of that specific enemy.
As you can see, Spriter makes creating, editing and tweaking game play related data, and synchronizing it
perfectly with each animation very easy and intuitive. In this example, not only have we included the hit
strength of a punch right into its collision rectangle, but we even made the number tween and change
depending on how much damage that punch in motion would inflict if it collided with an enemy at that
specific millisecond!
Be sure to read the next section: “Adding “Tags” to an Animation”, because Tags are the other, super
powerful and flexible half of the example logic I provided above for the collision box delivering the damage
ot the enemy. Specifically the portion:“AND the enemy is in a state where it can take damage.”
Tags are Spriters easy and intuitive way to designate what “state” your entity or character is in at any
moment along the time line of each animation.
